

Insta360 X5 Stabilization: Does It Really Work?
A mountain bike ride can look exhilarating in person, yet shaky footage can make every turn hard to watch. The Insta360 X5 is known for producing smooth 360-degree video, and its stabilization technology helps keep moving shots steady when you’re running, cycling, or skiing.
That matters when you want to capture the route without distracting camera shake or spending hours fixing footage afterward. Next, we’ll test how Insta360 X5 stabilization performs across real active-use scenarios.
Understanding the Magic Behind Insta360 X5 Stabilization
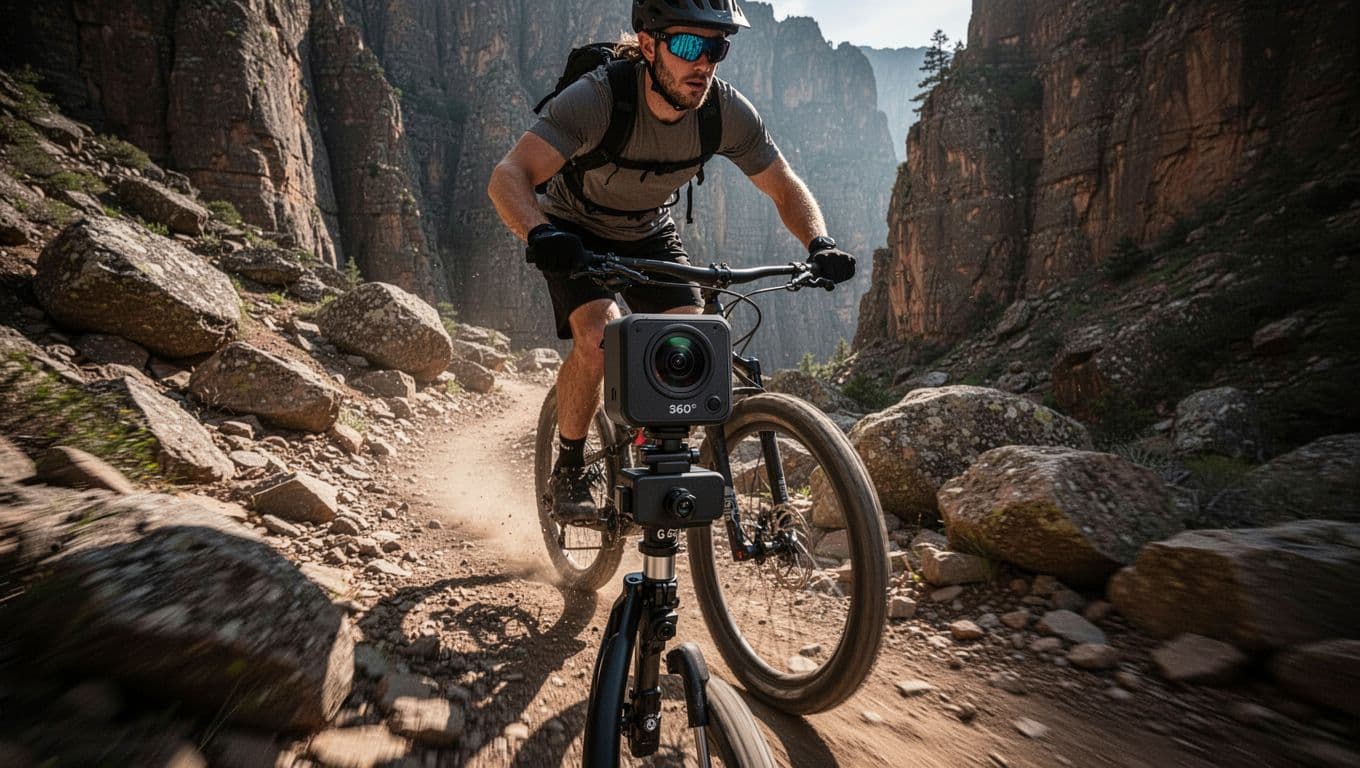
Capturing high-speed movement often feels like a constant battle against physics. Whether you are bombing down a rocky descent on your mountain bike or carving through fresh powder on skis, the resulting footage can easily become a nauseating blur. The secret to clean video lies in the internal hardware that acts as a digital counterweight for your camera. By combining precision sensors with advanced software algorithms, the system creates a virtual experience of professional cinematography without needing bulky external rigs.
How FlowState Technology Keeps Footage Buttery Smooth
At the core of the Insta360 X5 stabilization suite is FlowState technology. Think of it as a microscopic, ultra-fast gimbal living inside your camera. This system relies on a high-precision six-axis gyroscope that monitors the camera orientation hundreds of times per second. It detects even the slightest micro-vibrations from a bumpy road or an unsteady hand.
Once the sensors detect unwanted jitter, the software instantly compensates by cropping and rotating the frame in real time. Because the camera captures a wide 360-degree field of view, the software has plenty of extra image data to work with. It essentially shifts the frame to remain level, even if the camera itself is tilting or shaking. For a deeper look at the underlying mechanics, you can review this image stabilization camera guide. The end result is a viewing experience that looks like a high-end production crew followed you through the course with a cinema-grade stabilizer.
Why In-Camera Stabilization Beats Post-Processing
Relying on computer-based stabilization after your adventure often leads to wasted time and compromises in quality. When you bake the correction into your footage at the moment of capture, you eliminate the need to run heavy software processes after you get home. This efficiency is a massive benefit for busy creators who want to spend their time outdoors rather than behind a monitor.
Processing video through external software often causes unwanted side effects, such as warping or a “jello” effect in the frame. By using the internal stabilization hardware, you get a much cleaner result that preserves the integrity of your original files.
While some users might prefer to adjust parameters later for specific artistic needs, getting the core movement under control during the shoot is the best path to consistent quality. Sometimes, managing these settings in the field saves hours of frustration, as discussed in community discussions regarding stabilization workflows. You can trust your device to handle the heavy lifting while you focus on the activity at hand.
Getting the Most Out of Your Insta360 X5 Stabilization
Even the best camera hardware needs a stable foundation to reach its full potential. While the Insta360 X5 stabilization is impressive, your choice of mount often determines whether your final clip looks professional or merely watchable. Physical stability reduces the workload on the software, which preserves more image detail and reduces the risk of visual artifacts.
Choosing the Right Mounting Options for Stability
The physical connection between your camera and your body or gear acts as the first line of defense against vibration. You want a mount that keeps the camera rigid while allowing for the specific angles you need. A loose or bouncy mount forces the camera to work harder to correct jitter, which can lead to a slight loss in resolution around the edges of your frame.
For cycling, a chest mount provides a much more stable base than a helmet or handlebar setup. Because your torso naturally absorbs many of the vibrations from the road, the camera moves less than it would if mounted on the vibrating frame of your bike. If you prefer to mount the camera on your handlebars, ensure you use a high-quality, metal-reinforced clamp to eliminate unwanted movement.
Runners often find the most success with specialized body harnesses. These straps keep the camera centered and minimize the pendulum effect that occurs with head-mounted cameras. When skiing, consider a shoulder mount or a sturdy chest harness to capture the immersion of the slopes without the high-frequency jitter associated with mounting on a ski pole.
- Chest straps: These offer the best center-of-gravity stability for most high-impact sports.
- Handlebar mounts: Use these only if your bike has front suspension and the clamp is tightened to the manufacturer’s torque specifications.
- Helmet mounts: While great for wide perspectives, these are prone to micro-vibrations from wind drag and head movement.
Always double-check your mount tightness before you begin your session. A small amount of slack in a ball-joint mount grows into a significant distraction once you start picking up speed. You can find best practices for camera mounting to ensure your gear stays locked in position throughout the day.
Optimizing Camera Settings for Different Motion Types
Once your mount is secure, your software settings play a role in how the Insta360 X5 stabilization processes your movement. You might assume that higher resolutions are always better, but frame rate actually carries more weight for fast-paced action. Shooting at 60 frames per second provides the system with more data points to analyze, which results in much smoother compensation during sudden directional changes.
If you are riding a mountain bike on technical trails, stick to 5.7K at 60fps. This configuration gives the camera plenty of frames to detect and neutralize sudden impacts from rocks or roots. For slower activities like road cycling or casual skiing, 30fps is often sufficient and saves significantly on battery life and storage space.
Pay close attention to your shutter speed as well. Faster shutter speeds reduce motion blur but can make the stabilization look robotic. A good rule of thumb is to keep your shutter speed at double your frame rate. If you shoot at 60fps, aim for a shutter speed around 1/120th of a second. This balance maintains the natural motion of the scene while giving the software a clean image to work with.
When you prepare for an outing, take a moment to walk through your expected motion type. If you know you will be weaving through trees or navigating tight corners, verify that your camera is set to a wide field of view. This setting gives the internal software the maximum amount of “buffer room” to crop and level your footage without cutting off the subject. Taking thirty seconds to dial in these values before you leave the trailhead prevents the need for heavy-handed digital fixes after you return.
Comparing Real-World Performance in Action Sports
Testing how the Insta360 X5 stabilization performs in the wild reveals a clear distinction between controlled movement and unpredictable chaos.
While marketing clips often feature smooth glides on paved surfaces, the true test occurs when you push the device into high-impact environments. Running, skiing, and cycling each present unique challenges that force the camera to process motion in different ways. Success depends on the interplay between the internal sensors and the physical forces acting upon the chassis.
Handling High-Intensity Vibrations and Jitters
Extreme sports generate vibrations that can easily overwhelm standard electronic stabilization systems. When you mountain bike over rock gardens or carve through ice patches while skiing, the rapid, high-frequency shakes are particularly difficult to mitigate. The Insta360 X5 stabilization uses an advanced algorithm to distinguish between intentional panning and accidental, jarring movements.
On a mountain bike trail, the camera encounters erratic impacts that travel through the frame. A rigid handlebar mount often captures these micro-jitters as sharp, rhythmic pulses in the video. The internal software effectively neutralizes these pulses by constantly adjusting the horizon line. If the camera detects a sudden dip, it compensates by shifting the sensor data in the opposite direction.
Running Performance
Running presents a different set of obstacles, primarily defined by the periodic, vertical displacement of your body. Each footfall transmits a shockwave that travels upward through your shoulders and head. Because this motion is rhythmic, the processor maintains a consistent buffer to keep the horizon level. You might notice that while the background remains steady, the peripheral elements of the frame occasionally soften as the software crops the image to fill gaps left by the aggressive stabilization.
Skiing introduces high speeds and rapid carving motions. The challenge here is keeping the camera steady against the constant wind drag and the subtle, fluid movements of your upper body. In these conditions, the system excels because the motion is generally smoother than the jagged impacts of cycling. It preserves the sense of speed while removing the distracting shakiness that often ruins POV footage.
- Cycling: Requires handling intense, sharp impacts that test the limits of the sensor buffer.
- Running: Focuses on rhythmic, vertical oscillations that require consistent, predictive correction.
- Skiing: Needs to handle high-speed wind vibration and gradual, fluid changes in orientation.
For a clearer look at how these motion types affect the final output, consider the following performance observations.
| Activity | Primary Challenge | Stabilization Effectiveness |
|---|---|---|
| Mountain Biking | High-frequency impact | Very high |
| Trail Running | Rhythmic vertical shake | High |
| Downhill Skiing | Speed and wind drag | High |
The takeaway is that while the device is capable of smoothing out severe vibrations, physical mounts that dampen impact at the source will always produce superior results. By reducing the reliance on digital compensation, you retain more of the native resolution and image clarity. To see how these results compare to professional standards, check out this analysis of motion stabilization in action cameras. Your setup matters just as much as the internal technology when you face truly rough terrain.
Common Pitfalls When Using Insta360 Stabilization
Even with advanced software, your results depend heavily on how you manage the camera during your activity. Small oversights in preparation often turn smooth, cinematic potential into shaky, unusable files. Achieving professional-level Insta360 X5 stabilization requires more than just turning the camera on; it demands attention to how the device interacts with your gear and the environment.
Ignoring Mounting Rigidity
The most frequent mistake is attaching the camera to a surface that flexes or vibrates independently of the body. If your mount consists of thin plastic extensions or loose ball joints, the camera captures those micro-vibrations before the internal sensors can even process them. This creates a jittery, unnatural look that even the best digital correction struggles to fix.
Always prioritize direct, metal-reinforced connections. If you use an extension rod, ensure the locking mechanisms are tight and the rod itself is stiff enough to resist bending during high-speed movement. A camera that wobbles on a long, thin pole is a recipe for distorted footage that looks like it is swimming through the air.
Using Incompatible Refresh Rates
Shooting in low light with a high frame rate forces the camera to use a faster shutter speed than the lighting can support. This leads to a dark, noisy image that causes the stabilization algorithm to struggle with tracking details. When the software cannot find clear reference points in the frame because of motion blur or image noise, the result is a stuttering effect rather than a smooth glide.
Match your frame rate to your lighting conditions. If you are riding in a dense forest or during twilight, consider dropping from 60fps to 30fps. This change allows for a slower shutter speed, which keeps the image bright and provides the sensor with the crisp data it needs to calculate stabilization accurately.
Mismanaging the Camera Field of View
The software works by cropping into your 360-degree footage to keep the horizon locked. If you select a field of view that is already too tight, the camera has no buffer zone to pull from when you hit a bump. This forces the software to push the image resolution to its limit, often resulting in jagged edges or a sudden drop in quality during intense action.
Always shoot in the widest possible field of view if you plan on using heavy stabilization. You can easily crop into the frame later, but you cannot invent pixels that were never recorded. Giving the system more image data to work with ensures that the horizon stays flat, even when you lean hard into a sharp turn.
Failing to Account for Body Position
Many runners and cyclists forget that their own body is the primary stabilizer. Mounting the camera on a helmet while your head is bouncing creates a challenge that no amount of internal software can fully overcome. The camera has to work overtime to correct the extreme arc of head movement, which often creates an uncomfortable, disorienting perspective for the viewer.
Mounting the device on your chest or waist typically provides a more natural, stable base. These positions track the core of your body, which moves much more fluidly than the head or limbs. For a look at how professional athletes configure their setups, visit this guide on choosing action camera mounts. A little bit of planning regarding your mounting position will pay off with much more enjoyable footage.
When to Use External Stabilization Tools
The Insta360 X5 stabilization system is remarkably capable for most everyday adventures, but it has physical limits. Understanding when those limits occur helps you decide if your project requires additional support. While the camera relies on software algorithms to keep your horizon level, certain scenarios create motion that is simply too chaotic for digital correction alone. Recognizing these moments prevents you from relying on a software patch that might degrade your final image quality.
Overcoming High-Frequency Vibrations
Internal stabilization works best when it can predict and compensate for the camera’s movement within a reasonable range. If you mount your camera to a source that produces high-frequency, rapid-fire jitter, the internal sensors struggle to differentiate between purposeful camera pans and unwanted shake. This often results in a soft, hazy look or strange warping at the edges of your frame.
Think of this like a car suspension system. Your shock absorbers handle bumps in the road, but they cannot replace a stiff frame when you are driving over boulders. If your chosen activity involves mounting the device to rigid metal frames on mountain bikes or high-vibration motors, an external dampener or rubberized mount acts as an essential buffer. These accessories soak up the harsh micro-vibrations before they ever reach the camera body. This keeps the image sharp and allows the internal sensors to focus on larger, more graceful movements.
Managing Long Extensions and Booms
Using an extended selfie stick or a long mounting boom drastically amplifies even the slightest movement at your hand. As you lengthen the arm, the camera becomes a pendulum. Small adjustments in your grip translate into wide, sweeping arcs of motion at the end of the pole. While the Insta360 X5 stabilization can account for these shifts, you lose a significant portion of your resolution because the software must aggressively crop the frame to compensate.
If your shot requires a long, static boom, you should consider using an external stabilizer or a gimbal mount designed for 360-degree cameras. These tools handle the heavy lifting of keeping the camera steady, allowing the internal software to function in its most efficient mode. This combination preserves the full detail of your original files and creates a much smoother, more professional aesthetic for your final edit.
Capturing Extreme Cinematic Slow-Motion
Slow-motion footage is unforgiving when it comes to jitter. Because you are slowing down time, every tiny bounce or vibration is stretched and made more obvious to the viewer. While you can apply stabilization effects in post-production, the result often looks artificial, especially when the footage contains complex movement like high-speed skiing or fast cycling.
For projects requiring pristine, slow-motion sequences, keeping the camera perfectly still during the initial capture is vital. Using a tripod or a specialized mounting arm ensures your base is rock solid. You will find that this extra level of care during the shoot produces much cleaner slow-motion clips than trying to fix shaky, handheld footage later on your computer. When you eliminate the wobble at the source, your slow-motion shots retain their clarity and provide that crisp, high-end feel that makes for compelling action sports coverage.
Conclusion
Reliable camera work transforms how you preserve your most active moments. The Insta360 X5 stabilization system handles the heavy lifting, which allows you to focus on the trail, the mountain, or the road instead of your gear. You no longer need to worry about shaky, unwatchable video or complex post-production workflows.
Grab your camera, lock in your mount, and get out there with total confidence. Your next adventure deserves a clear, smooth perspective that actually captures the intensity of the experience.


