

St George Marathon Map: Course Route, Elevation & Race-Day Strategy
Race morning begins in the cool darkness near Central, Utah, where runners gather before the route drops through southern Utah’s red cliffs and long descents toward St. George. The St. George Marathon map helps you see more than the road ahead, including where the hills, aid stations, pacing demands, transportation points, and finish area fit into your race plan.
A clear look at the course can help you control the early downhill miles, prepare for changing elevation, and avoid last-minute confusion on race day. This guide shows you how to read the official map, plan transportation, and turn the route into a practical marathon strategy. Check the official St. George Marathon website for the current year’s map, road closures, aid station details, and any course updates before you travel. Also, make sure to book your St George Marathon hotels early so you save money.
Key Takeaways
- Use the official St. George Marathon course information to confirm the current map, aid stations, road closures, transportation, and finish-area details.
- Expect a point-to-point route with a major net descent from Utah’s high country into St. George, but protect your legs during the early downhill miles.
- Study elevation changes before race day so you can pace by effort, especially when cooler temperatures and gravity make the opening miles feel deceptively easy.
- Plan transportation, clothing storage, fueling, and post-race pickup before traveling to Central, Utah, because the start and finish areas are far apart.
How to Read the St. George Marathon Map Before Race Day
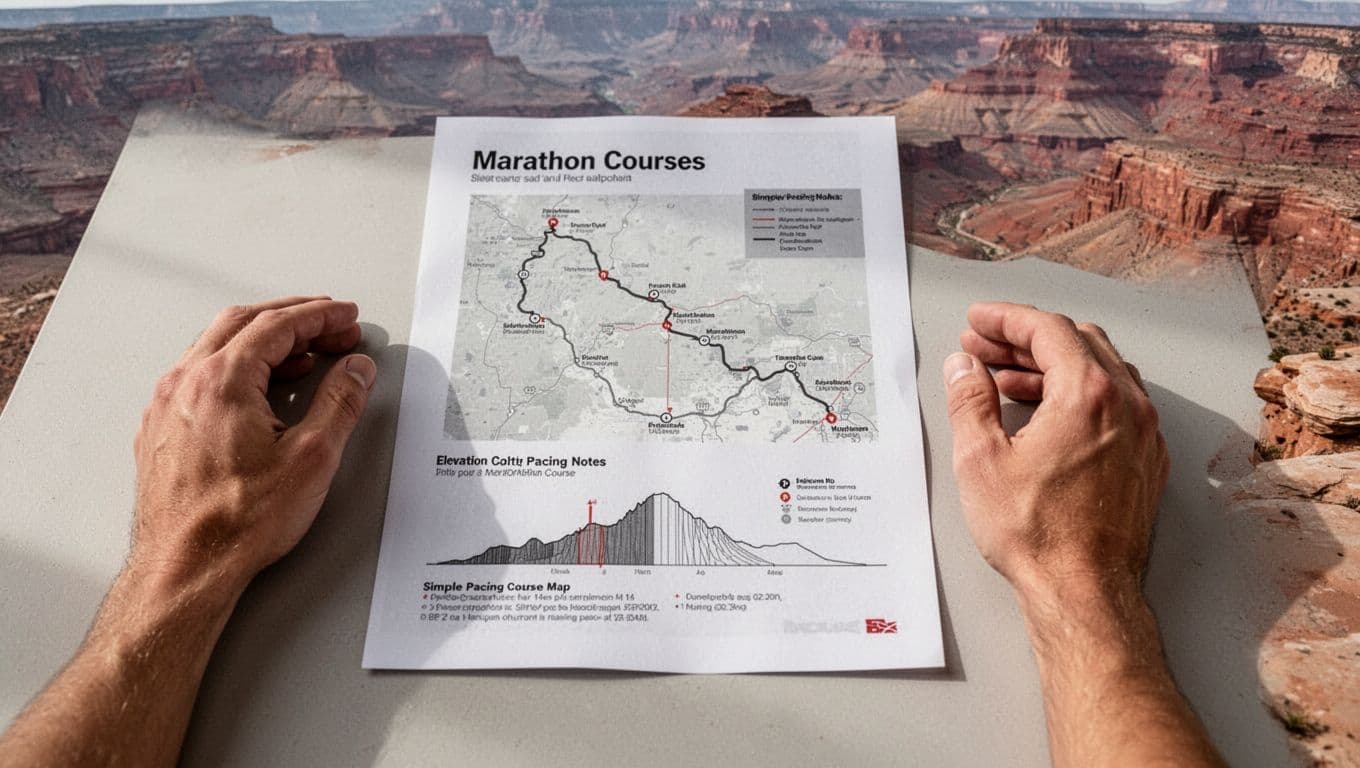
The St. George Marathon map is more useful when you read it as a race plan, not a single line between two points. Study where the course starts near Central, Utah, how it travels toward St. George, and where the terrain, support, and logistics may change your decisions.
Use the official St. George Marathon course information and the runner guide for the current race year. Course details can shift because of construction, road access, aid-station placement, or public-safety requirements.
Build Your Running Performance System
Move from research to action with training, recovery, nutrition, pacing, and performance tools built for runners.
More Guides for This Runner Goal
Identify the Route’s Main Landmarks and Turns
Begin at the start near Central, where runners gather before heading south toward St. George. Trace the complete point-to-point direction with your finger or a highlighter. Avoid studying only the final miles, because the early course can shape how your legs feel much later.
Look for the major roads named on the current map, including the sections along State Route 18 and the roads that carry runners into St. George. Recent course materials also identify the finish area near Worthen Park, but confirm the exact approach and finish layout in the current guide before race weekend.
Pay close attention to:
- The first major turn after leaving Central.
- Long downhill sections that may encourage an overly fast pace.
- Any out-and-back, merge, or lane-change areas shown on the map.
- The transition from open roads into St. George streets.
- The final turns near the finish, where crowds and fatigue can affect your focus.
A road name matters because it gives you a mental checkpoint. Pair each major turn with a pace, effort level, or fueling decision.
Mark Support Points and Elevation Changes
Next, find every mile marker, aid station, medical point, and restroom symbol. These locations help you decide what to carry and when to use it. Aid stations may offer water, sports drink, or other supplies, but check the runner guide for the exact offerings rather than assuming every station is identical.
The elevation profile deserves equal attention. A large net descent can make the opening miles feel easy, yet downhill running still places heavy stress on the quadriceps. Mark the miles where the course drops sharply, levels out, or begins to feel less forgiving.
A simple study method works well:
- Trace the entire course once to understand its direction and shape.
- Divide it into early, middle, and late sections based on terrain and landmarks.
- Mark key miles beside aid stations, medical points, restrooms, and major turns.
- Write one decision beside each section, such as hold back, take fuel, or reassess effort.
- Review the finish-area map so you know where to go after crossing the line.
The St. George marathon information page can also help you confirm race-day logistics. Recheck both sources shortly before traveling, because the current official map always takes priority over older screenshots, training notes, or third-party route summaries.
What the St George Marathon Course Feels Like in Each Section
The St. George Marathon course changes character several times. Early miles reward restraint, the Veyo climb demands patience, and the long descent toward St. George tests your quads more than your lungs. Use the official St. George Marathon course information for exact mile markers because road layouts and course details can change.
Opening Miles: Cool Air and Fast-Looking Roads
The opening miles near Central, Utah, often feel controlled and inviting. The air is cool, the road is open, and the downhill direction can make your goal pace seem effortless. That combination creates the first major danger: running faster than your planned effort before the race has truly begun.
Keep your stride relaxed and your breathing quiet. Let gravity assist you, but don’t chase the runners around you. Your target effort should feel comfortable and sustainable, even if your watch shows a pace several seconds faster than expected.
Avoid braking with every step on the descent. Instead, keep your feet under your body, maintain a light cadence, and allow your body to move forward naturally. Save your quadriceps for the later miles.
The Veyo Climb: A Short Test of Patience
The Veyo section breaks the early rhythm. The climb is not the longest part of the race, but it arrives after several downhill miles, when your legs may already feel unusually quick and loose. The change in grade can feel sharper than the elevation profile suggests.
Run this section by effort rather than pace. Shorten your stride, relax your shoulders, and keep your breathing under control. A modest pace slowdown is a smart trade if it prevents you from forcing the hill.
The goal on Veyo is to reach the top with your race intact, not to prove that you can hold downhill pace uphill.
Once the climb ends, resist the urge to sprint immediately. Let your breathing settle, then return gradually to your planned effort. Check the current St. George Marathon map for the precise location of the climb and nearby support points.
High Desert and Canyon Miles: Settle Into Rhythm
Beyond the early hills, the course moves through broad high-desert scenery, open roads, and changing views of southern Utah. This middle portion can feel peaceful, but it still requires attention because the terrain includes rolling sections rather than one uninterrupted descent.
Use landmarks to divide the miles into manageable pieces. Take fluids regularly, follow your fueling plan, and keep checking your posture as fatigue begins to build. Your target effort should feel steady and controlled, with enough reserve to handle the later descents.
The scenery can pull your attention outward, especially when red rock and canyon walls come into view. Enjoy it, but keep your race decisions simple. Hold your effort, stay alert at turns, and avoid making up time before the course gives you a clear downhill advantage.
Snow Canyon and the Major Descents
The Snow Canyon area adds visual drama and a more demanding feel to the route. Rock formations and canyon scenery can make this section memorable, yet the descent may also punish runners who attack it without control. Downhill running loads the quadriceps with repeated braking forces, even when your cardiovascular effort remains low.
Let your stride open slightly, but don’t reach far ahead with your feet. Keep your torso balanced over your hips and use the slope without fighting it. Your target effort should be firm but economical, not an all-out push.
The published elevation information for the St. George Marathon shows why this section deserves respect: the course loses far more elevation than it gains. That profile can produce a fast finish only when you protect your legs early.
Final Miles Into St. George: Hold Form Under Fatigue
As the route enters St. George, the race feels less isolated and more urban. The road, spectators, turns, and finish-area activity give you new reference points, but fatigue can make familiar decisions feel difficult. Follow the current map instead of relying on memory from a previous race.
At this stage, run by posture and effort. Keep your arms compact, lift your eyes, and focus on reaching the next turn rather than calculating the entire distance. If your legs still respond, gradually increase your effort. If they feel heavy, maintain form and protect your pace.
The final miles reward discipline more than early bravado. A runner who controls the opening descent, manages Veyo, and fuels through the canyon sections can reach St. George ready to race the finish.
How to Build a Race Plan From the St George Marathon Route Map
Turn the St George Marathon map into decisions you can follow when fatigue clouds your judgment. Mark your effort, fueling, clothing, and backup plans before race morning, then use technology to support those choices rather than control every step.
Create Pace Bands for Each Terrain Type
A single goal pace rarely fits this course. Build three pace bands around your target marathon pace, then adjust them by effort and weather.
- On early descents, run slightly faster than goal pace only if your breathing stays relaxed and your stride remains light.
- During the Veyo climb, allow your pace to slow while maintaining controlled breathing and steady effort.
- On flatter sections, return to goal pace without forcing the transition.
- During later descents, increase speed gradually if your quadriceps still feel strong.
For example, a runner targeting 3:30 pace may use 8:00 to 8:10 per mile on climbs, 7:55 to 8:05 on flats, and 7:40 to 7:55 on manageable descents. Those numbers are starting points, not promises. Wind, heat, congestion, and accumulated downhill stress can change the right pace.
The course loses substantial elevation overall, but the published St. George elevation profile shows why a fast opening can become expensive later. Protect your legs early so your pace remains available after mile 20.
A pace bracelet can display your split targets without requiring constant watch checks. Set watch alerts for each mile or half-mile if they help you stay within range, but silence them if they create anxiety. A printed mile chart taped to your bottle or memorized in five-mile blocks works just as well.
Use your watch to confirm your plan, not to negotiate with every hill.
Choose Your Distance, Duration and Goal Time
Make three quick selections and open the exact plan built for your race target.
Looking for a Fully Personalized Training Plan?
The training plans above are an excellent choice if they match your goal. However, if you’d rather train with a plan built specifically around your current fitness, goal race, preferred training days, weekly mileage, and target finish time, our RDA Custom Training Plans provide a personalized solution. We also have running courses available for runners seeking to run faster from the mile to the marathon.
Why Choose a Custom Training Plan?
| Standard Training Plan | RDA Custom Training Plan |
|---|---|
| Follows a fixed schedule | Built around your schedule |
| Standard weekly mileage | Peak mileage customized for you |
| Fixed workout days | Train on the days you choose |
| Same structure for everyone | Designed around your current fitness |
| Static plan | Updated as your fitness improves |
| One-time purchase | Ongoing personalized coaching and support |
What You’ll Receive
- A training plan built specifically for your goal
- Personalized training paces
- Long runs, tempo runs, threshold workouts, interval sessions, recovery runs, and easy runs
- Peak weekly mileage matched to your experience level
- Flexible training schedule that fits your life
- Ongoing plan adjustments as your fitness improves
Ready to Train Smarter?
Stop guessing and start following a plan built specifically for you, your schedule, and your racing goals.
Plan Fuel, Fluids, and Clothing Before the Start
Eat the same familiar pre-race breakfast you used during long training runs. Finish it early enough to settle your stomach, and avoid adding an unfamiliar gel, supplement, or oversized meal because the start feels intimidating.
During the race, take fuel at planned intervals before hunger appears. Many runners use gels or other carbohydrates every 30 to 40 minutes, but your training history should determine the exact schedule. Match each intake with water when the product requires it, and review the official St. George Marathon information for current aid-station locations and offerings.
Carry enough fuel to cover delays, crowded stations, or a missed handoff. Drink regularly, but don’t force large amounts at once. Cool morning air can hide fluid loss, while a warmer finish may increase your needs.
Choose clothing for the full route, not only the start near Central. Wear removable layers, use inexpensive gloves or a throwaway top if needed, and protect yourself from sun and wind later. Pack sunscreen, sunglasses, and a hat where race logistics allow access to them.
Write a Simple Contingency Plan
Your backup plan should fit on one small card:
- If wind or heat rises, run by effort and shorten your pace target.
- If your stomach turns, pause solid or concentrated fuel briefly and take small sips of water.
- If fatigue arrives early, hold steady effort, shorten your stride, and reassess after the next aid station.
- If pain changes your form, stop treating the watch as the priority and seek race support.
Check the official St. George Marathon website before traveling for current maps, transportation details, weather guidance, and course updates. A strong race plan gives you structure, yet it also leaves room to respond when the day differs from the paper map.
Training for the Climbs and Descents Shown on the Map
The St. George Marathon map shows a course that asks your body to handle more than a long downhill. You need durable quadriceps, uphill strength, steady marathon-pace fitness, and enough recovery capacity to absorb demanding workouts.
Train for the course in pieces. You don’t need to copy the entire route every weekend, and running every downhill at race effort will only drain your legs.
Build Long-Run Endurance Gradually
Your long run should grow through consistent weeks, not sudden mileage jumps. Add distance gradually, then schedule easier weeks when fatigue starts to linger. Newer marathoners may benefit from building time on their feet before adding aggressive hills, while experienced runners can include terrain-specific work sooner.
Begin with gentle rollers and short inclines. Later, place a longer climb inside a long run so your legs learn to work when they aren’t fresh. Keep most of these miles conversational. The goal is to strengthen your aerobic system and prepare your muscles for the course’s changing demands.
A long run on similar terrain is useful, but it doesn’t need to match the full St. George route. One controlled uphill segment and several relaxed downhill miles can provide enough stimulus without creating excessive soreness.
Develop Uphill Strength and Downhill Control
Uphill running builds force through your calves, glutes, and hamstrings. Run climbs with a shorter stride, a steady cadence, and relaxed arms. Avoid sprinting the hill unless your training plan calls for a brief repetition.
Downhills require a different skill. The repeated braking action can leave your quadriceps sore, especially when you haven’t practiced it. A recent review of uphill and downhill running explains how grade changes affect running biomechanics and physiology.
Add downhill exposure in small doses. Start with brief, moderate descents after an easy climb, then extend the downhill section over several weeks. Keep your feet landing beneath your hips instead of reaching forward, and let your pace increase naturally. You should finish each repetition with control, not with your legs collapsing.
Strength training can support this work when you perform it consistently. Include exercises such as:
- Split squats to build single-leg strength and stability.
- Step-ups to reinforce uphill drive and hip control.
- Calf raises to support lower-leg endurance.
- Controlled single-leg reaches or deadlifts to improve balance and coordination.
Use manageable loads and smooth repetitions. If you have an injury history, work with a qualified professional before adding demanding eccentric exercises or steep descents.
Add Marathon-Pace Work Without Forcing the Hills
Marathon-pace training teaches you to hold a steady effort after your legs have accumulated fatigue. Place these miles on a flat or gently rolling route first. Once your pacing feels reliable, finish selected long runs with a controlled block near marathon effort.
A map-based workout could look like this:
- Run 3 to 5 easy miles on gently rolling terrain.
- Complete one controlled climb for 10 to 15 minutes by effort.
- Continue over the crest, then run 3 to 4 relaxed downhill miles.
- Finish with 4 to 6 steady miles near marathon effort on flatter terrain.
- Cool down easily and record how your quadriceps felt afterward.
Adjust the distance to your experience and current training load. The workout should build confidence, not require several days of recovery.
Protect Recovery Between Hard Sessions
Downhill work often creates more muscle soreness than its pace suggests. Leave adequate recovery after hilly long runs, and keep the next day easy or take a rest day. Easy cycling, walking, sleep, and sufficient food can help you return to quality training sooner.
Watch for soreness that changes your stride, sharp pain, or fatigue that worsens across multiple days. Reduce volume before the problem grows. A short, controlled hill session repeated over time will prepare you better than one heroic course simulation.
Race Morning Logistics Around the St George Marathon Map
The St George Marathon is a point-to-point race, so race morning requires more planning than simply driving to a nearby starting line. Your route map should include the bus pickup location, parking plan, baggage process, restroom access, and post-race meeting point.
Review the official St. George Marathon transportation information before race weekend. Pickup locations, bus schedules, parking areas, and procedures can change each year. Save the current instructions to your phone and keep a screenshot available in case cell service becomes unreliable.
Confirm Transportation Before Leaving
Most runners should plan to use the official race transportation rather than drive themselves to Central. Check your assigned bus pickup location, arrival window, parking rules, and any required credentials. Give yourself extra time because thousands of runners may arrive within a short period.
Normal driving routes are unreliable on race morning. Roads along the course may close before sunrise, detours can add significant time, and traffic control may prevent you from reaching a familiar parking area. Local coverage has reported closures and traffic controls between Central and St. George, so read the current road closure information before choosing where anyone will drive.
Don’t depend on a rideshare driver or your phone’s navigation app to solve last-minute problems. Download directions, write down the pickup address, and share the plan with anyone traveling with you.
Handle Bags, Restrooms, and Spectators
Pack only what you need at the start. Follow the race’s current baggage instructions, attach the correct tag to your bag, and confirm where you can retrieve it after finishing. The city’s marathon information page includes race-bag details and pickup information, but check the current year’s schedule before relying on older dates.
Use a restroom before boarding the bus when possible, then locate the start-area facilities after you arrive. Lines may grow quickly, and the start can feel colder than the finish, so keep your outer layer until the last practical moment. Bring disposable layers only if the race permits them and explains how to discard them.
Spectators should attend only at locations allowed by official race guidance. Course closures may limit access, and some roads won’t provide safe parking or crossings. Choose a viewing spot based on published instructions rather than guessing from the St George Marathon map.
After the finish, agree on one meeting area away from the finish chute. Pick a recognizable public landmark, keep the plan simple, and account for delayed texts or weak service.
Use a Race-Week Checklist
The night before, confirm:
- Your bib, timing device, fuel, and familiar breakfast are packed.
- Layers match the latest weather forecast, including gloves or sun protection if needed.
- Transportation, parking, and bus pickup details are saved offline.
- Your emergency contact information is written inside your bag or phone case.
- Your baggage tag, meeting point, and post-race pickup plan are clear.
A few minutes of preparation can prevent a race morning spent searching for a bus, bag, or friend. Once those details are settled, you can focus on the road shown on the map.
Frequently Asked Questions
The St. George Marathon map answers many route questions, but race-day details can still create uncertainty. Use these answers as a quick planning reference, then verify every logistical detail against the latest official information.
Where does the St. George Marathon start and finish?
The St. George Marathon is a point-to-point race. It starts near Central, Utah, then follows the course toward the finish in St. George, Utah.
Because runners don’t return to the starting area after the race, transportation deserves as much attention as pacing. Confirm the exact start line, finish location, bus procedures, parking rules, and access restrictions through the official St. George Marathon information before race weekend. Event logistics can change because of road conditions, public safety, or city requirements.
Is the St. George Marathon course mostly downhill?
Yes, the route includes substantial downhill running, but the course isn’t one continuous drop. It features early climbs, rolling terrain, and demanding late-race miles that can challenge runners who spend too much energy at the beginning.
Downhill elevation also doesn’t guarantee an easy race. Each descent creates repeated impact and braking forces through your quadriceps, especially when you run beyond your controlled effort. Hold back early, shorten your stride on sharper slopes, and judge your pace by breathing and leg response.
Can I drive the St. George Marathon course before race day?
Some parts of the route may be accessible at certain times, but you must follow posted traffic rules, closures, and safety restrictions. Race roads may close temporarily, and normal access can change during course setup or event operations.
Use the official St. George Marathon map and course-preview materials to study landmarks without assuming you can drive the full route freely. If you preview sections by car, stay on legal public roads and never enter restricted areas. A map review often gives you the information you need without adding traffic or parking problems.
What should I do if the official map changes?
Treat the latest official map and runner guide as the final source. Older maps, screenshots, training notes, and third-party route descriptions may show turns or support points that no longer match race day.
After checking for revisions, update your pacing notes, aid-station plan, transportation schedule, and spectator arrangements. Pay close attention to changed turns, road closures, parking instructions, and support locations. Even a small route adjustment can affect where you expect to see family or take fuel.
How early should runners arrive at the marathon start?
Follow the event’s published transportation and arrival window instead of planning backward from the starting time alone. Buses may require early boarding, and thousands of runners can create delays before the first mile.
Build extra time for transportation, security or check-in procedures, restrooms, clothing adjustments, warm-up, and the walk to your corral. Arriving early gives you room to handle a misplaced bag or long restroom line without rushing. Keep your final minutes simple, with familiar movements rather than an improvised workout.
What is the best way to save the course map on my phone?
Download the official map and runner guide before leaving for the start. You can also save screenshots of transportation instructions, parking details, the finish area, and your meeting point.
Cell service may be limited along parts of the route, while cold temperatures can drain your phone battery faster. Carry a portable charger if race rules allow it, but remember that the digital map is a planning tool. Follow course signs, volunteers, and official race instructions when they differ from an old screenshot.
Conclusion
The St. George Marathon map is more than a picture of the route. It is a race blueprint for pacing, fueling, hill preparation, transportation, and mental strength. Respect the early climb, stay smooth on the descents, fuel before fatigue appears, and save energy for the final miles into St. George.
Study the latest official map, practice your pacing and downhill control in training, and arrive ready to adjust for weather, road conditions, and race-day changes. When you know where the course demands patience and where it rewards restraint, the red-rock scenery becomes part of a deliberate performance. Run with a clear plan, stay composed when the terrain changes, and give yourself the best chance to finish strong.


